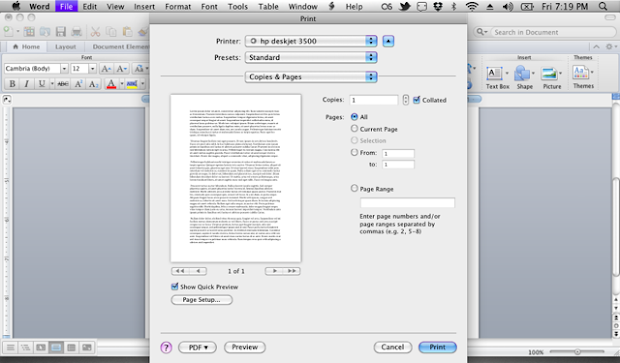
I’m running Mac OS X Snow Leopard from my eeePC 1005HA and as you know, eeePC has a very low screen resolution (1024x600) . This make some applications window/interface not visible thus making some options or buttons unusable/unclickable . An example is the Print window from Microsoft Office as shown in the picture below.
To be able to view the whole window I need to increase my screen resolution to a higher resolution, but it’s not possible to further increase the screen resolution in my eeePC since 1024x600 is the max resolution that I can get .
But thankfully, you can edit plist files in MacOS to simulate a higher resolution view for certain apps or the whole system (I do not recommend using this method as a way to increase the resolution for the whole system or permanently since some apps won’t render correctly using this method, ex. misplaced input box). This trick can be done through the Terminal command, but I’m going to explain how to this using a 3rd party application .
First you need to download Pref Setter, grab it from the homepage (It’s Free! ). After you’ve downloaded the file, extract and drag the Pref Setter applications to your Applications Folder. Open Pref Setter app.- In the application window you’ll see a list of plist files grouped into 3 group: System Preferences, Registration Domain, and User Preferences. These plist files are files that store the preferences for specific applications or system configuration (well, sort of ).
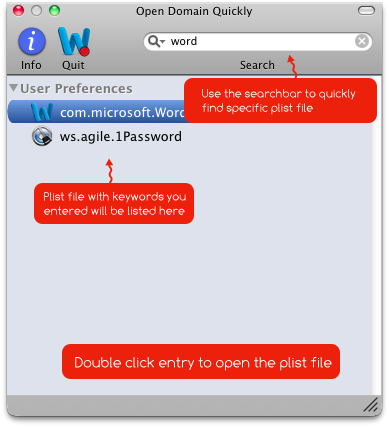
Now what we gonna do is edit a specific application plist file to set a virtual resolution for that application. Ex, I’m going to edit Microsoft Word plist file, what I’m gonna do is to search for “word” from the application search bar. Plist files with keyword “word” will be listed in the windows, in my Mac there are two plist files with keyword “word”: com.microsoft.Word and ws.agile.1Password. Since I’m going to edit the Microsoft Word plist file, I’m going to double click on the com.microsoft.Word entry.
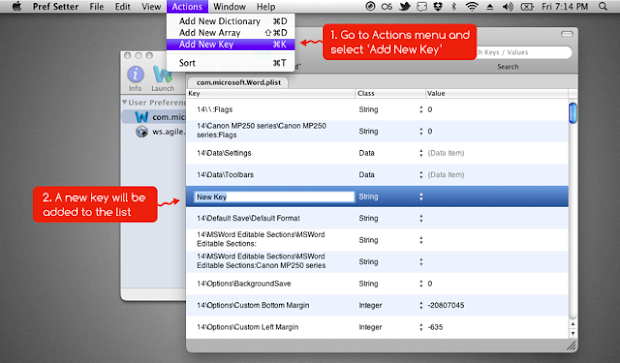
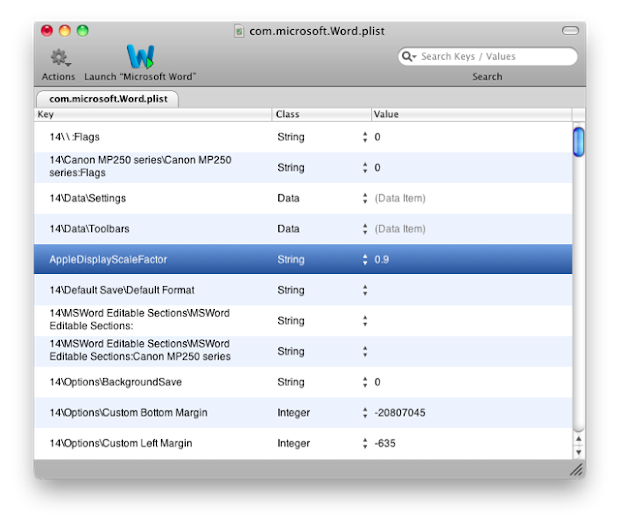
A new window will appear with a list of stored keys inside that plist file along with the values.
We’re going to add a new key, go to the ‘Actions’ menu and select ‘Add New Key’ or simply press ⌘K. A new line will be added to the list.
Change the key value to AppleDisplayScaleFactor and choose String for the class type. Change the value to 0.8 or 0.9 (should be enough to make the whole window visible, you can set the value to a lower value but it’s not recommended). Hit ⌘S to save the plist file.
ReLaunch Microsoft Word and voila! Microsoft Word windows will look smaller / zoomed out thus I will be able to view the whole Print window. Remember, you can add “AppleDisplayScaleFactor” key to any applications plist of your choice .
If you want to return the application view back to normal, simply delete the AppDisplayScaleFactor key .
 . This make some applications window/interface not visible thus making some options or buttons unusable/unclickable
  . An example is the Print window from Microsoft Office as shown in the picture below.
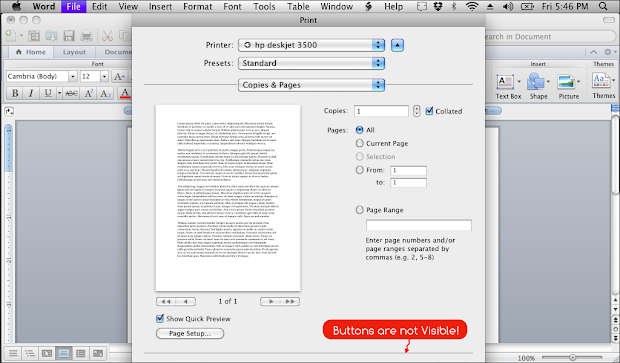
 .
. (I do not recommend using this method as a way to increase the resolution for the whole system or permanently since some apps won’t render correctly using this method, ex. misplaced input box). This trick can be done through the Terminal command, but I’m going to explain how to this using a 3rd party application
  .
. ). After you’ve downloaded the file, extract and drag the Pref Setter applications to your Applications Folder. Open Pref Setter app.- In the application window you’ll see a list of plist files grouped into 3 group: System Preferences, Registration Domain, and User Preferences. These plist files are files that store the preferences for specific applications or system configuration (well, sort of
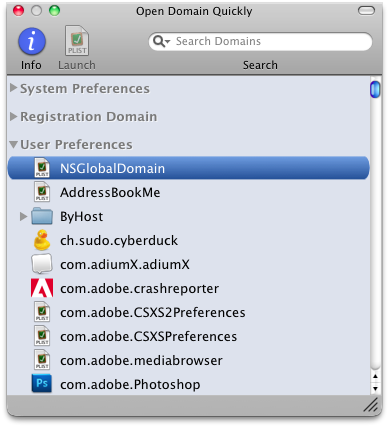

 Microsoft Word windows will look smaller / zoomed out thus I will be able to view the whole Print window. Remember, you can add “AppleDisplayScaleFactor” key to any applications plist of your choice
  .
.
 .
.